Adding Data Columns (from Data Model Tab)
The Data Columns on a report list data variables for which the report designer can set applicable variables. Report data is displayed in the body section of the report where the majority of the report data generally appears.
Follow the steps below to add data columns (from the Layout Tab) to the report:
- Access the SmartInsight Designer.
- Open an existing report or create a new report.
- Select the Data Model tab on the Design Panel located on the right side of the window.
- Left click the Data Model folder, and then click the appropriate sub folder, such as Fields, to expand it.
- Drag and drop the desired object from the expanded folder to the Report Data section of the Designer canvas.
Result: The object now displays in the Report Data section in its own column. - Click the object just placed in the Report Data section of the canvas.
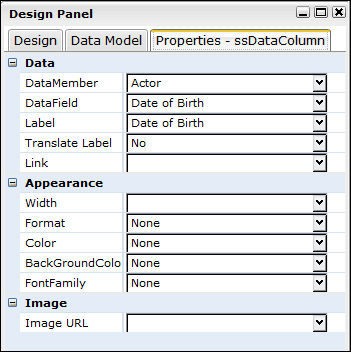
Result: The Properties dialog for the object is displayed in the Design panel located on the right side of the window.

- Click the drop down arrow in the DataMember field, and select the data member to be used in this column.
Result: The DataMember field displays the selected data member.
NOTE: Some of these fields are already completed by default if you choose a field from the data model.
- Click the drop down arrow in the DataField field, and select a label for the data column (if applicable).
Result: The DataField field displays the selected label. - Set any other applicable properties.
- Save the report by selecting Report > Save from the main menu.
See Also